What is Syslog :-
Syslog is a standard for message logging. It permits separation of the software that generates messages, the system that stores them, and the software that reports and analyzes them. Each message is labeled with a facility code, indicating the software type generating the message, and assigned a severity label.
Why Need to setup Central Log Server :-
In Today's computing generation, We need to check Asset logs time to time to know what is going on.
For a System Administrator, it is a primary responsibility to Check logs. Central Log server provide facility to store logs to a central location and analysis them when required.
In this blog How to setup, Central log server to forward ESXi host's logs.
1- Setup Central log server first :-
To setup Central Log Server please visit my previous blog-
https://linuxhowtoguide.blogspot.ca/2016/07/how-to-setup-central-log-server.html
2- ESXi host side configuration :-
We can make required changes with two methods:-
a) using command esxcli
b) Using Vshpere Client Console.
A) Let's enable setting using CLI method.
3- To check Version of running ESXi run command.
[root@localhost:~] esxcli --version
Script 'esxcli' version: 6.0.0
4- Display current Syslog configuration :-
[root@localhost:~] esxcli system syslog config get
Default Network Retry Timeout: 180
Dropped Log File Rotation Size: 100
Dropped Log File Rotations: 10
Enforce SSLCertificates: false
Local Log Output: /scratch/log
Local Log Output Is Configured: false
Local Log Output Is Persistent: true
Local Logging Default Rotation Size: 1024
Local Logging Default Rotations: 8
Log To Unique Subdirectory: false
Message Queue Drop Mark: 90
Remote Host: <none>
[root@localhost:~]
In above output, you can see default log path and no remote host is set to accept log.
esxcli system syslog config set --loghost='udp://192.168.138.129:514'
[root@localhost:~] esxcli system syslog config set --loghost='udp://192.168.138.129:514'
Where 192.168.138.129 is Central Log Serve IP Address
esxcli network firewall ruleset set --ruleset-id=syslog --enabled=true
[root@localhost:~] esxcli network firewall ruleset set --ruleset-id=syslog --enabled=true
8- To Apply changes reload firewall configuration.
[root@localhost:~] esxcli network firewall refresh
In above output, Now you can see remote logging server has been added.
10- Let's analysis ESXi host log on Central log server.
Login to log server using putty.
root@LXD:~# ls -l /var/log/centrallog/
total 20
drwx------ 2 syslog syslog 4096 Jul 26 20:23 localhost.localdomain
In above output, one directory with ESXi host name exist, which contain all logs of this ESXi host.
11- To check current log use below command.
Select ESXi host in vSphere console.

Go to Configuration Tab


That's All
!!! Cheers !!!
[root@localhost:~] esxcli --version
Script 'esxcli' version: 6.0.0
4- Display current Syslog configuration :-
[root@localhost:~] esxcli system syslog config get
Default Network Retry Timeout: 180
Dropped Log File Rotation Size: 100
Dropped Log File Rotations: 10
Enforce SSLCertificates: false
Local Log Output: /scratch/log
Local Log Output Is Configured: false
Local Log Output Is Persistent: true
Local Logging Default Rotation Size: 1024
Local Logging Default Rotations: 8
Log To Unique Subdirectory: false
Message Queue Drop Mark: 90
Remote Host: <none>
[root@localhost:~]
In above output, you can see default log path and no remote host is set to accept log.
5- Add remote host to accept logs.
esxcli system syslog config set --loghost='udp://192.168.138.129:514'
Where 192.168.138.129 is Central Log Serve IP Address
514 is Syslog port.
6- Reload Syslog configuration to applied changes.
[root@localhost:~] esxcli system syslog reload
7- Enable firewall and allow Syslog outgoing port.
By default ESXi 5.x and 6.x blocked outgoing to all port which is not required to increase security.
Use below command to open Syslog port.
8- To Apply changes reload firewall configuration.
[root@localhost:~] esxcli network firewall refresh
9- Let's check changed configuration.
[root@localhost:~] esxcli system syslog config get
Default Network Retry Timeout: 180
Dropped Log File Rotation Size: 100
Dropped Log File Rotations: 10
Enforce SSLCertificates: false
Local Log Output: /scratch/log
Local Log Output Is Configured: false
Local Log Output Is Persistent: true
Local Logging Default Rotation Size: 1024
Local Logging Default Rotations: 8
Log To Unique Subdirectory: false
Message Queue Drop Mark: 90
Remote Host: udp://192.168.138.129:514
[root@localhost:~]
10- Let's analysis ESXi host log on Central log server.
Login to log server using putty.
root@LXD:~# ls -l /var/log/centrallog/
total 20
drwx------ 2 syslog syslog 4096 Jul 26 20:23 localhost.localdomain
11- To check current log use below command.
root@LXD:~# tail -f /var/log/centrallog/localhost.localdomain/syslog.log
2016-07-29T07:49:08.670Z localhost.localdomain Hostd: --> maxObjectUpdates = 100
2016-07-29T07:49:08.670Z localhost.localdomain Hostd: --> }
2016-07-29T07:49:08.672Z localhost.localdomain Hostd: info hostd[3114CB70] [Originator@6876 sub=Solo.Vmomi opID=8ca22758 user=root] Throw vmodl.fault.RequestCanceled
2016-07-29T07:49:08.672Z localhost.localdomain Hostd: info hostd[3114CB70] [Originator@6876 sub=Solo.Vmomi opID=8ca22758 user=root] Result:
2016-07-29T07:49:08.672Z localhost.localdomain Hostd: --> (vmodl.fault.RequestCanceled) {
2016-07-29T07:49:08.672Z localhost.localdomain Hostd: --> faultCause = (vmodl.MethodFault) null,
2016-07-29T07:49:08.672Z localhost.localdomain Hostd: --> msg = ""
2016-07-29T07:49:08.672Z localhost.localdomain Hostd: --> }
2016-07-29T07:49:08.673Z localhost.localdomain Hostd: error hostd[FFEE2A70] [Originator@6876 sub=SoapAdapter.HTTPService.HttpConnection] Failed to read header on stream <io_obj p:0x3260130c, h:33, <TCP '0.0.0.0:0'>, <TCP '0.0.0.0:0'>>: N7Vmacore15SystemExceptionE(Connection reset by peer)
2016-07-29T07:49:08.674Z localhost.localdomain Rhttpproxy: verbose rhttpproxy[FFCF0B70] [Originator@6876 sub=Proxy Req 00111] Resolved endpoint : [N7Vmacore4Http16LocalServiceSpecE:0x4452ad78] _serverNamespace = /sdk _isRedirect = true _port = 8307
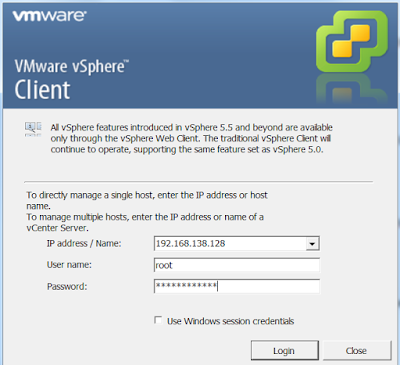
1- Connect Esxi Host using vSphere client.
B ) Enable Syslog server Setting using VMware vSphere Client.
1- Connect Esxi Host using vSphere client.

2- Add Log Server IP address

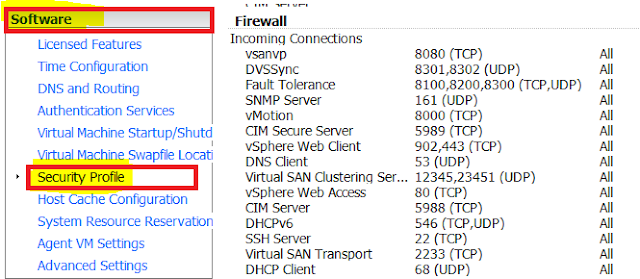
Go to Configuration Tab

Select Advanced Setting under Software section from left side Action menu.

Select Syslog from left side menu Add Syslog Server address (udp://192.168.138.129:514) in syslog.globle.logHost section.

Close configuration menu and click on Ok button.
3- Allow Syslog port from Firewall.
Go to Configuration Tab

Select Security Profile from left side.
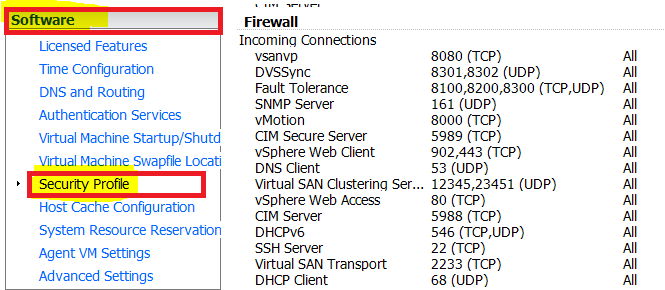
Select Firewall Properties.
Select the Check box of Syslog and apply changes.

4- Required changes have made successfully on ESXi host.
Let's login to Log server and Check log's file.
That's All
!!! Cheers !!!
Great guide on forwarding VMware ESXi 5.x and 6.x host logs to a central log server! Centralized logging is essential for better management. Check out hekate switch for more log management tips!
ReplyDelete